Creating Stunning 3D Art with a Layered 3D File - Card - Shadowbox
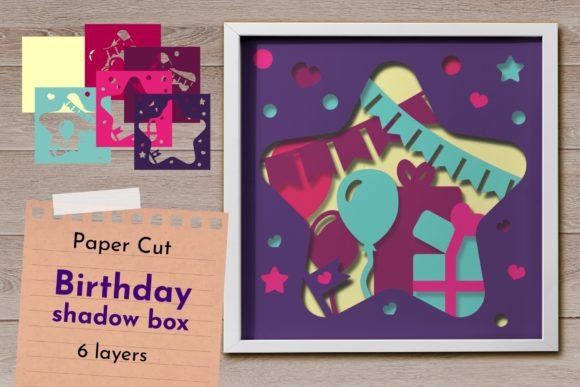
For crafters and DIY enthusiasts, the Layered 3D File - Card - Shadowbox offers an innovative way to bring depth and dimension to their handmade creations. This versatile template is specifically designed for use with cutting machines such as Cricut or Silhouette and allows users to produce intricate 3D cards, nursery art, baby shower gifts, mini shadowboxes, and more. With its layered design, this file provides a professional look that can elevate any personal project into a standout piece of art.
What Is a Layered 3D File?
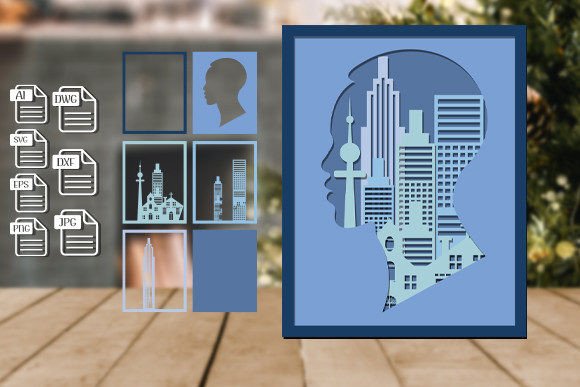
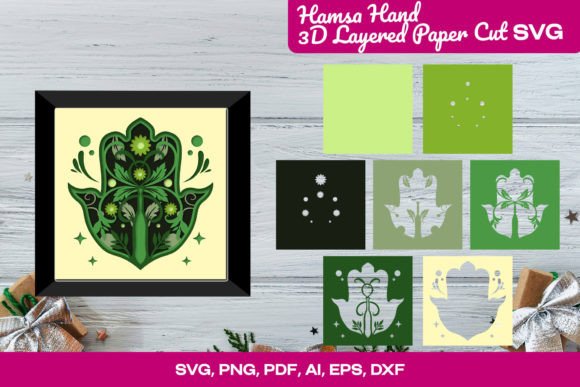
A Layered 3D File typically consists of multiple layers that are cut separately and then stacked together to form a three-dimensional effect. The Card - Shadowbox version includes three distinct layers — including the back layer — each carefully crafted to align perfectly when assembled. These files are often in vector format, like SVG or DXF, which ensures they maintain quality at any size. When printed and cut from cardstock of at least 200 grams, the final product achieves a clean, crisp edge essential for the 3D illusion.
Why Choose This Template?
Traditional paper crafts tend to be flat and two-dimensional, but with a Layered 3D File - Card - Shadowbox, you can add visual interest and tactile appeal to your projects. Whether you're creating a greeting card for a special occasion or designing a personalized shadowbox for a baby's room, this template helps you achieve a polished result without requiring advanced crafting skills. It’s also ideal for those who want to experiment with scale — using the original 12×12 cm size for cards or enlarging it for shadowboxes with LED lights and frames.
Common Challenges in Crafting with Layers
Many hobbyists find working with layered designs challenging. Misalignment between layers can ruin the intended effect, especially if scaling isn’t done correctly. Additionally, small details in the design can break or become distorted when the file is resized improperly. That’s why the Layered 3D File - Card - Shadowbox is structured to help avoid these pitfalls. Each layer is clearly defined and formatted for precise alignment, making the assembly process straightforward even for beginners.
How to Use the File Effectively
To get the best results from the Layered 3D File - Card - Shadowbox, it’s important to follow some key steps:
- Use the correct materials: For the 3D effect to stand out, we recommend using cardstock that is at least 200 grams thick. Thicker stock holds up better during cutting and maintains its shape once assembled.
- Scale properly: While the file can be scaled up to fit larger projects like shadowboxes, it should not be scaled down below the original 12×12 cm size due to the presence of fine details. If you do choose to scale, make sure all three layers are adjusted proportionally to ensure proper alignment.
- Assemble with care: Once the layers are cut, take time to stack them correctly. The included JPG in the zip file shows the correct order for the layers, so refer to it before gluing anything in place.
Practical Applications and Creative Possibilities
The beauty of the Layered 3D File - Card - Shadowbox lies in its adaptability. Here are some popular ways people use it:
- Greeting Cards: At its original size (12×12 cm), this file works perfectly as a standalone card. Simply layer the pieces and glue them onto a folded card base for a stunning 3D pop-up effect.
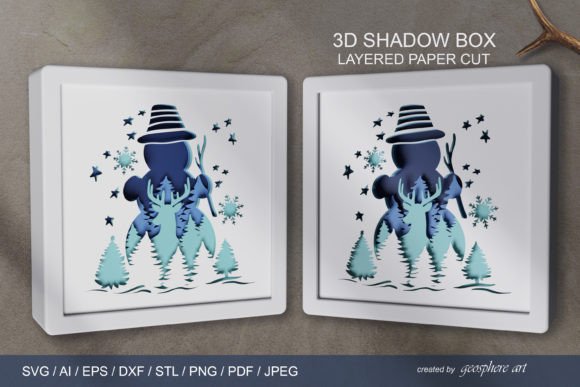
- Nursery Art: Enlarge the file and mount it on foam board or wood for a decorative wall hanging. Add mini LED lights inside the shadowbox frame for a soft glow that creates a warm atmosphere in a baby’s room.
- Baby Shower Gifts: Customize the design with names or dates and present it as a unique gift. It can be placed inside a picture frame or used as a keepsake box filled with baby items like pacifiers or hair clippings.
- Mini Shadowboxes: Scale up the design and embed it in a shallow wooden or acrylic box. These make excellent home decor items or personalized gifts for birthdays and anniversaries.
Considerations for Different Users
Whether you're a seasoned crafter or just starting out, the Layered 3D File - Card - Shadowbox can be tailored to suit your needs. Beginners may appreciate the clear instructions and pre-designed layers that simplify the creation process. More experienced users might enjoy customizing the colors, adding textures, or integrating other elements like rhinestones or fabric accents to enhance the overall aesthetic.
If you're a teacher or party planner, this file could be used in group activities or as part of a themed event. Its scalability makes it suitable for both individual projects and bulk production. Just remember to keep the layers aligned and to handle the delicate parts with care to preserve the design’s integrity.
Getting Started: A Quick Guide
Here’s how to begin using your Layered 3D File - Card - Shadowbox:
- Download the zip file, which contains one SVG file with all layers and a DXF folder with individual files per layer.
- Open the SVG file in your preferred cutting software and review the layers. Make sure they’re grouped correctly for cutting.
- If you plan to scale the file, adjust all layers simultaneously to maintain the design’s proportions and alignment.
- Load the appropriate cardstock into your cutting machine and set the blade depth according to the material thickness.
- Cut each layer carefully, and use the provided JPG reference to arrange them in the correct order.
- Adhere the layers using strong adhesive and let them dry completely before handling further.
- Mount the completed design onto a card, frame, or shadowbox for display or gifting.
Enhancing Your Project with Additional Elements
Once the basic structure is complete, consider adding creative touches to make your project even more special. You can incorporate metallic foils for a shiny finish, paint the background for added color, or attach photos and other memorabilia inside a shadowbox. For cards, adding a few strategically placed glitter accents can catch the light beautifully and highlight the 3D components.
If you're planning to use the file for a shadowbox with LED lighting, be sure to leave enough space around the design for wiring and power sources. Some crafters prefer using battery-operated fairy lights to keep things simple and safe.
Why Go 3D? The Benefits Explained
Incorporating a Layered 3D File - Card - Shadowbox into your crafting routine has several advantages:
- Visual Impact: 3D designs draw attention and create a sense of depth that flat images cannot match.
- Customization: You can easily personalize the design by changing colors, fonts, or adding names and dates.
- Versatility: The same file can be adapted for different purposes — from cards to framed art — simply by adjusting the size and mounting method.
- Reusability: With digital templates, you can print and cut the design multiple times, making it perfect for events like baby showers or weddings where you need several identical pieces.
Tips for Success
While the Layered 3D File - Card - Shadowbox is user-friendly, here are a few tips to help you avoid common mistakes:
- Always test-cut on scrap paper before using high-quality cardstock.
- Check the alignment of the layers before gluing — misaligned pieces can compromise the 3D effect.
- Use a ruler or measuring tape to ensure accurate placement of each component.
- Allow adequate drying time for adhesives to prevent warping or shifting.
- Store unused layers flat to avoid curling or bending, which can affect the final look.
Final Thoughts
The Layered 3D File - Card - Shadowbox is a powerful tool for anyone looking to add dimension and elegance to their handmade projects. Whether you're crafting for a loved one or preparing for an upcoming event, this template simplifies the process while delivering impressive results. By following best practices for cutting, scaling, and assembling, you can create beautiful 3D cards, shadowboxes, and nursery decorations that will be cherished for years to come.
Investing in a quality layered file means investing in creativity and precision. With the right approach, you’ll be able to transform simple materials into something truly extraordinary — all with the help of a well-designed digital template and your favorite cutting machine.