Ugly Sweater 3D Shadow Box Papercut – A Creative Addition to Your Seasonal Projects
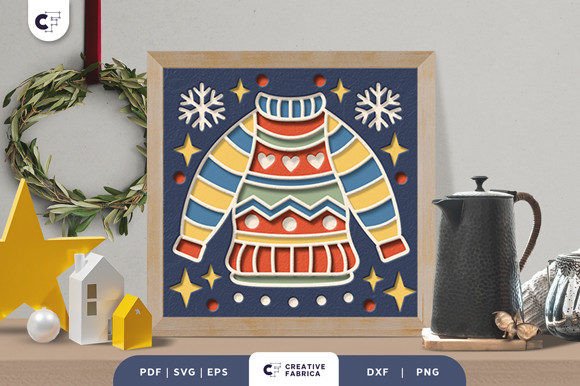
The Ugly Sweater 3D Shadow Box Papercut is a unique and eye-catching craft project that blends seasonal charm with intricate design. This layered paper cutting template features a festive, whimsical ugly sweater motif in a square format, ideal for creating dimensional winter decorations. Whether you're preparing for the holiday season or looking to add a personal touch to your home decor, this papercut offers a versatile solution that can be adapted to various crafting tools and techniques.
Understanding the Design and Its Components
This template includes seven distinct layers, each contributing to the depth and visual appeal of the final product. The dimensions are set at 20.32×20.32 cm, ensuring it fits well within standard picture frames or shadow boxes. The files provided—SVG, PDF, EPS, PNG, and DXF—are compatible with a wide range of digital and manual cutting tools. If you own a Silhouette or Cricut machine, the SVG file allows for easy and precise cutting. For those without digital equipment, a sharp art knife and scissors will work just as effectively.
A key feature of this design is its scalability. While the SVG file can be resized, maintaining the same aspect ratio is crucial to preserving the integrity of the layered structure. Additionally, the design is optimized for use with Encore Cardstock (80 lb cover, 216 gsm), which provides durability and crisp lines. However, feel free to experiment with other types of cardstock based on your preference or availability.
Preparation and Assembly Process
Before beginning, gather all necessary materials: the chosen cardstock, cutting tools, glue or double-sided tape, and optionally, an LED light strip if you plan to create a light box version. Start by printing the PDF or using your cutting machine to generate the layers. Each layer should be cut accurately to ensure proper alignment during assembly.
Once all pieces are ready, carefully align them in order and apply adhesive between each layer. Take your time to ensure the alignment is correct, as even small misplacements can affect the overall look. If you're making a framed piece, insert the assembled layers into a mat board or frame backing before placing them inside a standard picture frame. Alternatively, build a custom shadow box to house the papercut and allow more room for creative additions like lighting or background textures.
Integrating Into Larger Projects and Workflows
The Ugly Sweater 3D Shadow Box Papercut isn’t just a standalone decoration—it can be integrated into broader creative workflows. For instance, educators might use it as part of a classroom activity to teach students about layering, spatial awareness, and holiday traditions. Entrepreneurs could incorporate it into their product line for seasonal retail offerings, such as personalized gifts or home decor items.
If you're managing a creative project timeline, consider including this papercut as a pre-holiday task. It requires minimal setup but benefits from careful planning. Here's how it might fit:
- Planning Phase: Decide on the use case—wall art, gift item, or light box—and source appropriate materials ahead of time.
- Creation Phase: Cut and assemble the layers. This step can be done individually or as part of a team effort.
- Integration Phase: Add finishing touches like LED strips or mount it in a frame. This is where creativity can shine and the project becomes truly unique.
- Deployment Phase: Display the finished piece or package it as a gift. Consider photographing the result for social media or marketing purposes.
Enhancing Visual Impact with Lighting and Framing
To elevate the design beyond traditional wall art, try incorporating LED strips between the layers. This technique transforms the papercut into a glowing focal point, perfect for holiday displays or office decorations. When adding lights, choose ones that are thin and flexible to avoid disrupting the delicate balance of the layers. You may also need to adjust the mounting method to accommodate the wiring and power source.
Framing options vary depending on your desired outcome. A simple matte frame works well for a clean, modern look. For a more dramatic effect, opt for a shadow box frame that allows the layers to stand out. These frames often have deeper profiles, giving the papercut a more three-dimensional presence. Always consider the environment where the piece will be displayed—avoid high-moisture areas if using glue or electronic components.
Use Cases and Practical Applications
- Gifts and Personalized Items: Create one-of-a-kind holiday cards or framed gifts for friends and family. Adding a name or date via digital editing enhances the personalization.
- Home Decor: Hang the papercut as part of your winter theme, or place it in a prominent location to add character to a living space.
- Office or Retail Displays: Use multiple copies of the design to create a cohesive holiday display in a store window or office lobby.
- Photography and Social Media: Finished projects make excellent props for holiday-themed content. They can also serve as samples for selling online or in person.
Compatibility and Workflow Tips
One of the advantages of the Ugly Sweater 3D Shadow Box Papercut is its compatibility with both digital and manual tools. If you're working with a group or in a classroom setting, having multiple formats ensures everyone can participate regardless of the tools they have access to. The SVG file is particularly useful for those who want to streamline the cutting process using machines like Silhouette or Cricut, while the DXF format suits laser cutter enthusiasts.
For seamless integration into your workflow, organize your materials before starting. Label each layer to avoid confusion during assembly. If you’re using cardstock, keep track of which colors you’ll be applying to each layer. A small notepad or checklist can help maintain consistency, especially when producing multiple units for resale or events.
Quality Control and Long-Term Use
Maintaining quality throughout the process is essential, especially if you're creating several versions. Check each cut for accuracy and smooth edges, and test the alignment before gluing. If you notice any inconsistencies, take the time to troubleshoot—adjust your cutting settings or refine your hand-cutting technique.
For long-term use, protect the finished papercut with a UV-resistant glass frame or acrylic sheet. This helps prevent fading from direct sunlight. If you've added LED lighting, ensure the wiring is secure and won't degrade over time. Regular maintenance, such as dusting the frame or checking the lights, keeps the piece looking fresh year after year.
Customization and Creative Freedom
While the template provides a solid foundation, don’t hesitate to customize it. Try different color schemes to match your interior design or brand identity. You can also modify the background by painting it or using patterned paper beneath the layers. These small changes let the design reflect your personality or the preferences of your audience, whether it’s clients, customers, or loved ones.
Consider combining the papercut with other elements like dried flowers, holiday stickers, or fabric scraps. These additions can turn a simple decoration into a mixed-media masterpiece. Just remember to balance aesthetics with functionality—don’t overcrowd the layers or compromise the visibility of the central design.
Getting Started: A Quick Overview
Here’s a simplified guide to begin your project:
- Select your preferred cardstock and print or cut the layers.
- Carefully trim each layer using the provided templates.
- Assemble the layers with glue or double-sided tape, starting from the back and moving forward.
- Mount the completed design in a frame or shadow box.
- Optionally add LED strips for a glowing effect.
- Display or package the final piece for gifting.
Each step can be adjusted based on your experience level and available resources. Beginners may want to start with a single unit to get comfortable with the process, while experienced crafters can scale up production for larger projects or sales opportunities.
Final Thoughts
The Ugly Sweater 3D Shadow Box Papercut is more than just a fun holiday project—it’s a versatile tool that can enhance your creative output across various contexts. From educational activities to business promotions, it offers a way to infuse seasonal spirit into tangible, high-quality creations. With proper preparation and attention to detail, you can produce a beautiful piece that stands out in any setting.
Remember, the design is a template meant to inspire. Feel free to adapt it to suit your needs and style. Whether you're crafting for yourself, your home, or your audience, this papercut adds a touch of joy and craftsmanship that resonates well with the holidays.